Open topic with navigation
Collecting Remaining Balances
If you elect to allow users to pay a partial amount via a down payment option, there is some maintenance that must be done manually to collect the remaining balances. Don’t let the word manual scare you, collecting remaining balances is not automatic, but it is very simple. Three quick clicks is all it takes to process these payments. For more information on the down payment option, see Down Payment.
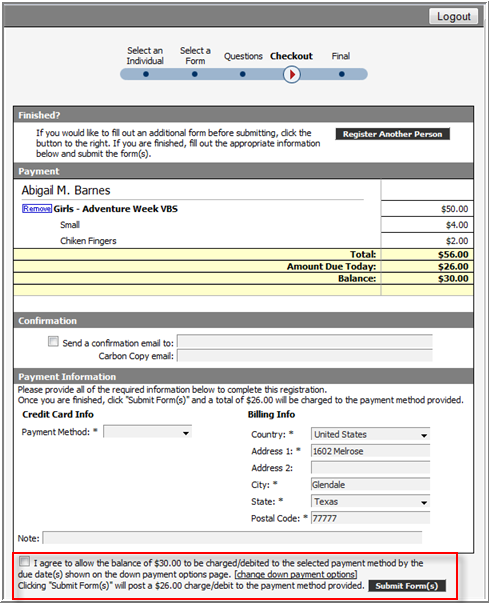
Remember that the user has already agreed to allow you to collect the remaining balance. There is a check box agreement statement at the bottom of the check out screen as shown below. This agreement allows you to collect remaining balances.
To collect outstanding balances
- Optionally, run Core Report M6023‐Core WebForm Submission Records to see which registrants have outstanding balances.
- Click WebLink > Event Registration > View Submissions to display the submitted form list.
- Select the form to work with from the Form drop‐down list and click Search. All registrants for this particular form appear. If you did not run M6023, you can quickly see who has a remaining balance due by looking at the Paid column amount.
- Click View beside any forms that have remaining balances. The submitted form summary appears. Any remaining balance will be displayed in the Receipt panel.
Note: To add payments, you must have the WebLink Payment security access right. If you do not have this access, the Add Payment option will not display.
- Click Add payment in the Receipt panel. The Add Payment/Refund form appears. Notice that the previous payment method and amount due are automatically populated for you.
Note: If the person paid by paper check or cash, the Payment method and Previous methods fields are blank. You will have to contact these people for a payment method to collect remaining balances.
- Optionally, you may change any of the pre‐selected options. For example, if you plan on allowing multiple payments to your event, simply clear the Amount field and type in the amount that you want to charge. Additionally, you may choose alternate Payment methods as needed.
- Optionally, select the Email receipt check box if you would like to email a receipt to someone after you process the payment. The receipt will appear in a new window.
- Click Add payment and then click Done to return to the form summary. You will notice that the Receipt panel is updated to include the payment.